

Maintaining optimal temperatures is crucial for a high-performance gaming PC. As games become more demanding and hardware specifications continue to increase, efficient cooling is essential to ensure your system runs smoothly and reliably. This guide will walk you through the process of choosing and installing cooling modules for your gaming PC, helping you keep your system cool and performing at its best.
1. Understanding the Importance of Cooling
Cooling modules are vital for several reasons:
- Performance: Overheating can throttle CPU and GPU performance, leading to decreased frame rates and stuttering.
- Longevity: High temperatures can shorten the lifespan of your components. Effective cooling helps maintain hardware longevity.
- Stability: Proper cooling reduces the risk of system crashes and errors caused by thermal issues.
2. Types of Cooling Solutions
There are two main types of cooling solutions for gaming PCs: air coolers and liquid coolers.
2.1 Air Coolers
Air coolers use fans and heat sinks to dissipate heat from the CPU or GPU.
- Heat Sinks: Made of aluminum or copper, heat sinks absorb and dissipate heat. They come in various designs, such as tower-style or low-profile.
- Fans: Air coolers use fans to blow air through the heat sink, enhancing heat dissipation. Some coolers come with multiple fans for better airflow.
Pros:
- Easier to install
- Generally more affordable
- Requires less maintenance
Cons:
- Can be bulkier and may obstruct other components
- Less efficient for overclocking compared to liquid coolers
2.2 Liquid Coolers
Liquid coolers use a closed-loop system to transfer heat away from the CPU or GPU.
- Radiator: The radiator dissipates heat from the liquid, often using fans to enhance airflow.
- Pump: The pump circulates the coolant through the system.
- Coolant: A special liquid that absorbs and transfers heat. Did you like the article? Read also about Comparing Popular Gaming Platforms: PC vs. Consoles.
Pros:
- More efficient cooling, especially for overclocking
- Less bulky compared to large air coolers
- Often quieter operation
Cons:
- More complex installation
- Higher cost
- Requires regular maintenance and monitoring
3. Choosing the Right Cooling Solution
Selecting the appropriate cooling solution depends on several factors:
3.1 CPU or GPU Cooling
Determine whether you need cooling for your CPU, GPU, or both. Some high-performance systems benefit from dedicated cooling solutions for each component.
3.2 System Compatibility
Check compatibility with your PC case and motherboard:
- Case Size: Ensure the cooling solution fits within your case and does not obstruct other components.
- Mounting Options: Verify that your motherboard supports the mounting bracket for the cooler.
3.3 Performance Needs
Consider your performance needs:
- Stock Cooling: For standard gaming setups, a high-quality air cooler may suffice.
- Overclocking: For overclocking or high-performance builds, a liquid cooler may provide better results.
3.4 Budget
Cooling solutions vary widely in price:
- Budget Options: Basic air coolers can be affordable and effective for standard use.
- High-End Options: Advanced liquid coolers offer superior performance but come at a higher cost.
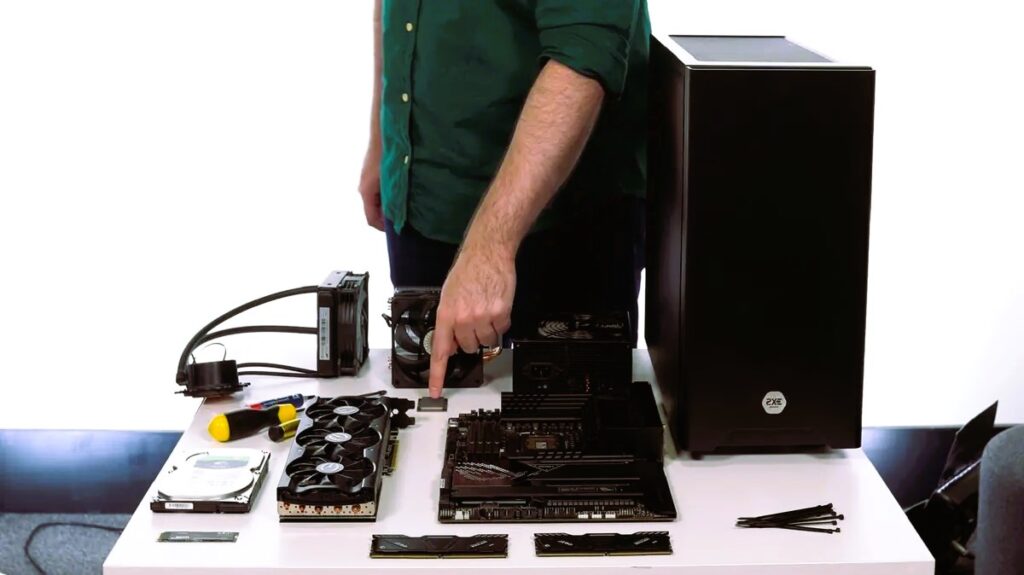
4. Installing Air Coolers
Step 1: Preparation
- Power off your PC and unplug it from the wall.
- Remove the side panel of your PC case to access the CPU.
Step 2: Removing the Old Cooler
- If replacing an existing cooler, carefully remove it by unscrewing or unlatching it. Clean any residual thermal paste from the CPU.
Step 3: Applying Thermal Paste
- Apply a small amount of thermal paste to the center of the CPU. This helps with heat transfer between the CPU and the cooler.
Step 4: Installing the Cooler
- Align the cooler with the mounting holes and secure it using the provided screws or clips. Attach the fan(s) to the cooler and connect them to the motherboard.
Step 5: Final Checks
- Reattach the side panel and plug your PC back in. Power it on and monitor temperatures to ensure proper installation.
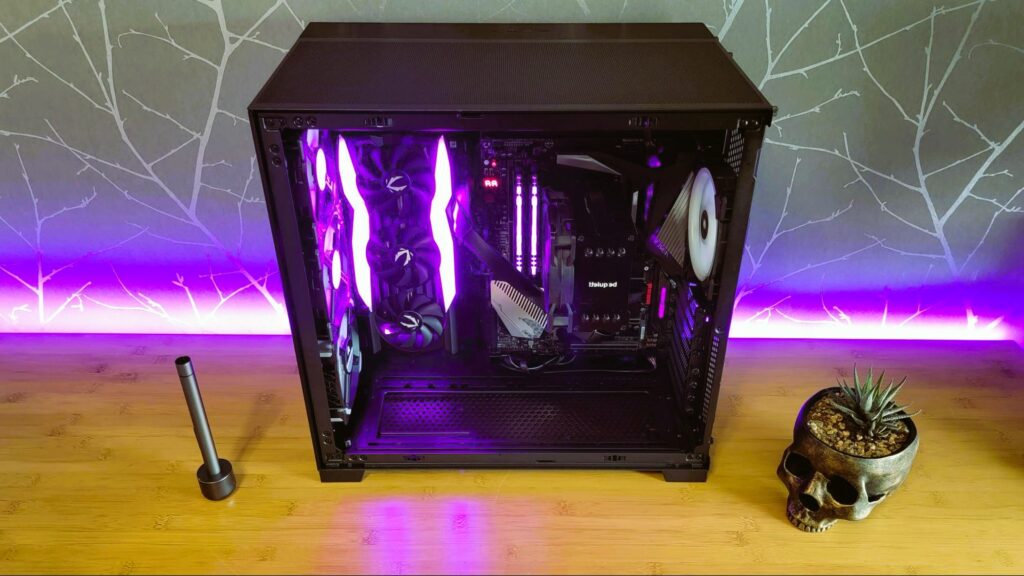
5. Installing Liquid Coolers
Step 1: Preparation
- Power off your PC and unplug it. Remove the side panel of your PC case.
Step 2: Mounting the Radiator
- Choose a location for the radiator (top, front, or bottom of the case). Secure the radiator using the provided screws.
Step 3: Installing the Pump
- Attach the pump to the CPU using the provided mounting bracket and thermal paste. Ensure the pump is securely fastened.
Step 4: Connecting Tubes and Fans
- Connect the tubes from the pump to the radiator. Attach the radiator fans and connect them to the appropriate headers on the motherboard.
Step 5: Final Checks
- Reattach the side panel and plug in your PC. Power it on and check for leaks and proper cooling performance.
6. Maintenance and Monitoring
Regular maintenance and monitoring are crucial for long-term performance:
- Check for Dust: Clean dust from fans and radiators regularly to maintain airflow.
- Monitor Temperatures: Use software tools to monitor CPU and GPU temperatures and ensure they stay within safe ranges.
- Inspect Liquid Coolers: Periodically check for leaks or signs of wear in liquid cooling systems.
7. Conclusion
Choosing and installing the right cooling modules is essential for maintaining the performance and longevity of your gaming PC. Whether you opt for air or liquid cooling, ensuring proper installation and maintenance will help keep your system running at its best. For additional information on cooling standards and practices, visit Wikipedia’s Cooling Technology Article.
By following this guide, you can optimize your cooling setup and enjoy a smoother, more reliable gaming experience.